Ham radio fans have been entranced by amateur radio communication for a long time. Constructing a ham radio from the ground up is an energizing mission that permits you to investigate this captivating leisure activity further. Here, we will encourage you to fabricate your own ham radio, giving all of you the necessary data and tips to begin.
To start, let’s investigate the components expected to manufacture a ham radio.
- You will require a transmitter and receiver, which are the central components of any correspondence framework.
- Moreover, antennas assume a critical job in catching and transmitting signals successfully. Comprehending the science behind the antenna plan will permit you to improve your radio’s exhibition.
Next, it is fundamental to acquaint yourself with the different technologies and frequencies utilized in ham radio tasks. This information will permit you to pick the fitting gear and design your setup as needs be. Additionally, getting an essential comprehension of gadgets will demonstrate helpful during the development interaction, encouraging investigation and customization.
Presently, let’s examine some interesting subtleties that will expand your insight into ham radio development. One vital part is picking between units or structures from discrete components. While units offer comfort and straightforwardness, collecting individual components permits a higher level of customization. Also, guaranteeing legitimate ground for your gear helps limit obstruction and improves general execution.
Pro Tip: When sourcing components for your ham radio venture, consider investigating online networks and gatherings devoted to amateur radio aficionados. These platforms give valuable bits of knowledge and proposals from experienced individuals who can help you in choosing top-notch components at sensible prices.
Welcome this hands-on experience of fabricating your own ham radio and open unlimited potential outcomes in amateur correspondence. Recall to draw near each progression with interest and persistence as you go on this remunerating voyage inside the bright universe of ham radios!
Understanding the Basics of Ham Radio
Ham radio, also known as amateur radio, is an amazing hobby. It enables folks to communicate wirelessly over long distances. Messages are sent/received using designated radio frequencies. In emergencies or when connecting with other enthusiasts worldwide, ham radio is essential.
To begin, one needs a license from the FCC. This shows operators have the right knowledge and skills to use the equipment correctly and legally. Also, the license grants access to different bands and modes of communication.
Next, acquire the right equipment. A transceiver is a central component, that sends/receives signals. Buy quality equipment that works on various frequencies and modes. Plus, the right antenna type is key for signal propagation.
For optimal performance, use proper grounding/installation techniques. Coaxial cables with minimal loss should be used between the transceiver and antenna. Plus, a ground connection enhances safety and performance.
Regular practice boosts ham radio skills. On-air conversations or contests help develop communication abilities. Join local clubs or online communities to learn from experienced operators and exchange insights.
Gathering the Necessary Equipment
Gathering the Essential Equipment
To build a ham radio, you must first gather the necessary equipment. Here is a 3-step guide to help you with this process:
- Research and identify the specific components required for your ham radio setup. This may include a transceiver, an antenna, a power supply, and various accessories.
- Purchase the equipment from reputable sources. Ensure that you select high-quality products that meet your needs and budget. Consider consulting with experienced ham radio operators or joining online forums for recommendations.
- Set up your equipment according to the manufacturer’s instructions. Ensure proper grounding and connect all components correctly. Test the system to ensure it is functioning properly before attempting to use it for communication.
When gathering the necessary equipment, it is important to consider your specific requirements and preferences. Factors such as frequency range, power output, and intended use should be taken into account to ensure a successful build.
True History:
Ham radio, also known as amateur radio, has a rich history dating back to the early 20th century. It started as a hobby for enthusiasts experimenting with wireless communication. Over the years, it has evolved into a global network of operators who use their radios for public service, emergency communications, and personal communication purposes. Today, ham radio continues to be a popular hobby that offers a unique and rewarding way to connect with people around the world.
Ready to tune in to some ham radio action? Here’s your guide to building a radio transceiver from scratch, because why buy one when you can reinvent the wheel and broadcast your own witty commentary?
Radio Transceiver
A Radio Transceiver is key for long-range communication. It combines a transmitter and receiver, to both send and receive signals.
Here’s what it’s made of:
- Antenna: Captures and emits radio frequencies.
- Transmitter: Changes audio signals into waves.
- Receiver: Makes waves into audio signals.
- Frequency Tuner: Adjusts the frequency for clear reception.
- Volume Control: Sets the audio output.
Advanced models may have encryption or GPS systems.
The concept of a radio transceiver started in the early 20th century. It was used for two-way communication during WWI. As time passed, technology advanced and the design became more compact and efficient. Now, radio transceivers are used around the world.
Having a reliable radio transceiver is very important for communicating in remote locations or emergencies.
Antenna
Let’s get up close and personal with antennas. Check out the table for key info about types:
| Antenna Type | Frequency Range | Gain (dBi) | Polarization |
|---|---|---|---|
| Dipole | 2.4GHz – 5GHz | 2 – 3 | Vertical |
| Yagi | 900MHz – 2.4GHz | 7 – 12 | Horizontal |
| Patch | 1.9GHz – 2.4GHz | 6 – 10 | Linear |
We need to consider more than that. Think signal strength, range, and interference. Different scenarios may need special antennas. So, knowing their traits helps you choose the right one.
Don’t underestimate the power of a good antenna! When selecting, factor in the frequency range, gain and polarization. That way, you can get the most out of your device. Choose wisely!
Power Supply
We utilize the power supply to furnish the necessary electrical energy for our equipment. Let’s delve deep into this important component!
Power supplies come in all shapes and sizes, suitable for a variety of devices. Picking the right one ensures optimal performance and extended life.
Throughout history, power supplies have grown by leaps and bounds. From primitive batteries powering simple machinery, they have evolved into complex systems that supply continuous electricity to keep our modern world humming.
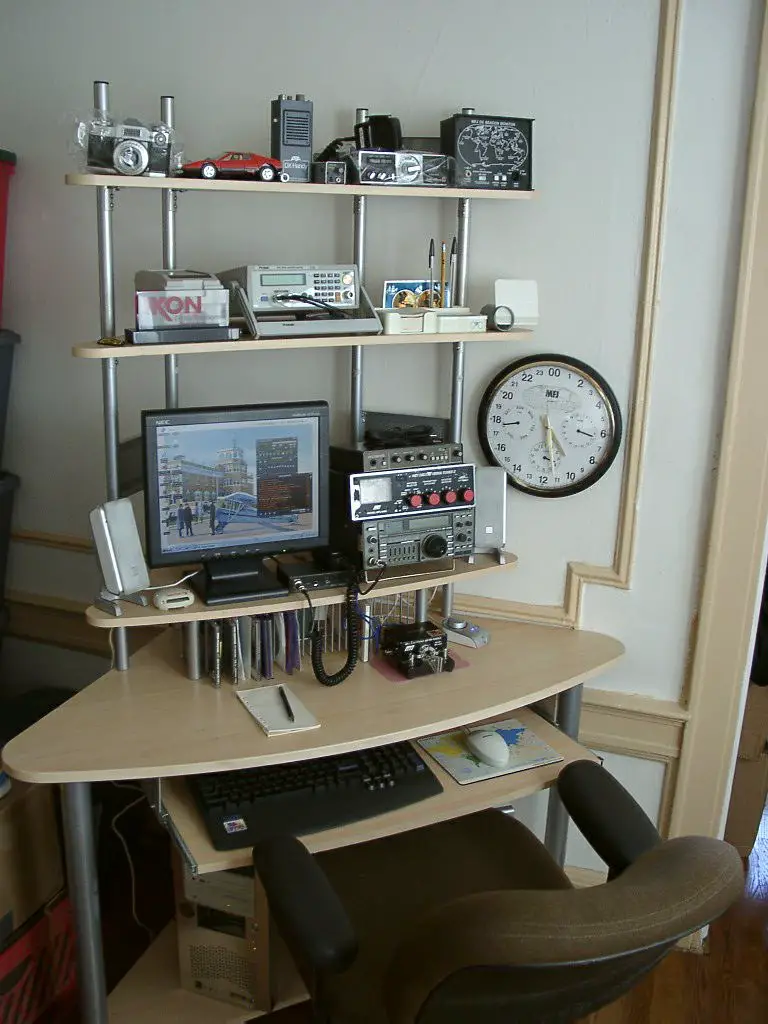
Setting Up the Ham Radio Station
Setting up a ham radio station involves several important steps. Here’s a concise guide to get you started:
- Equipment: Gather the necessary components such as a transceiver, power supply, antenna, and cables.
- Antenna Installation: Determine the best location for your antenna, considering factors like height, clear line of sight, and grounding.
- Connection Setup: Connect your transceiver to the power supply and antenna, ensuring proper grounding and using appropriate connectors.
- Frequency Programming: Set the desired frequency bands on your ham radio, considering legal requirements and local regulations.
- Testing and Calibration: Perform initial tests to ensure everything is functioning correctly, and adjust settings as needed to optimize performance.
Additionally, it’s essential to remember that different ham radios may have unique setup requirements. Refer to the manufacturer’s instructions for detailed guidance tailored to your specific equipment.
Now that you have a basic understanding of setting up a ham radio station, don’t miss out on the incredible opportunities this hobby offers. Start building your station today and join the global community of amateur radio enthusiasts. Happy ham radio adventures await!
Remember, your neighbours will love the sound of static interference in the middle of the night, so find a location far from anyone who values their sanity.
Choosing the Right Location
Finding the ideal spot for your ham radio station is crucial for optimal performance and communication. Here are some factors to think about when picking the perfect location:
| Location Factors | Description |
|---|---|
| Electromagnetic Interference | Stay away from power lines, electrical devices, and other sources of interference. |
| Antenna Placement | Look for an area with enough space for antenna setup and proper elevation for signal transmission. |
| Clear Line of Sight | Find a place with an unobstructed view in all directions to improve signal propagation. |
| Accessibility | Opt for a spot that you can easily get to for maintenance and operation, like close to where you live or work. |
| Grounding | Search for a location where you can secure good grounding connections to lower noise levels and better radio performance. |
Besides these standard aspects, it’s vital to assess your surroundings. Population density, geographical features, nearby buildings, and local laws can significantly affect your decision. Being aware of these elements will help you make a well-informed selection tailored to your needs.
To make the most of your station, here are more tips:
- Ask experienced ham radio operators or join local clubs for advice on places that have worked well.
- Check out different spots within the proposed area to see the signal strength and quality.
- Examine the proximity of high-power transmitters or large metal structures to avoid RF hazards.
- Think about security; select a location that safeguards your equipment and minimizes risk.
By looking closely at these points, you can set up a great ham radio station with clear communication and enjoyable experiences, without interference or limits. The right spot sets the groundwork for outstanding ham radio operation.
Installing the Antenna
Choosing the location? Find one with no obstructions, like buildings or trees. Assemble the antenna as per the instructions. Secure it in place with mounting hardware, and make sure it is level and upright. Connect the coaxial cable to your radio equipment, making sure all connections are tight. Tune and test your setup using an SWR meter, and different frequencies and distances.
Also, make sure you comply with local regulations about antenna height and location. Safety must be priority number one.
I had a unique problem when setting up my antenna. Nearby power lines caused interference issues. After some serious troubleshooting and repositioning, I found a spot that reduced disruptions and increased signal strength. This made me realize how important it is to consider environmental factors when installing an antenna.
Follow these steps, keep an eye on details specific to your location and you will be ready to communicate reliably with your new antenna system.
Connecting the Transceiver
Connecting the transceiver is vital for setting up a ham radio station. Here are 3 steps to guarantee perfection:
- Locate the “ANT” or “ANTENNA” antenna connector at the back of the transceiver. Plug in one end of the coaxial cable.
- Look for the same labelled port on your antenna system. Plug in the remaining end of the coaxial cable.
- Tighten screws and clamps for a steady connection. Double-check all connections before continuing.
Also, keep these tips in mind:
- Shorten cable lengths to avoid signal degradation.
- Install surge protectors and lightning arrestors to shield your equipment from power surges.
- Ground your station to eliminate interference and enhance performance. Attach a ground wire from your transceiver and antenna system to a grounding rod or other suitable grounding point.
For the best results:
- Select coaxial cables with low-loss properties.
- Put your antenna away from obstructions for better signal propagation.
- Inspect and maintain your connections and cables regularly.
By following these steps and advice, you can reliably and efficiently connect your transceiver to your ham radio station.
Learning the Ham Radio Terminology
The process of acquiring knowledge about the terminology used in operating a ham radio can be enlightening and essential for effectively using the equipment. By familiarizing oneself with the various terms involved in ham radio communication, individuals can navigate the intricacies of this field more proficiently.
Here is a table presenting the key terms related to learning ham radio terminology:
| Term | Definition |
|---|---|
| Call sign | A unique identification assigned to amateur radio operators. |
| Q code | Three-letter codes are used as a shorthand in radio communication. |
| DX | Abbreviation for “distant station,” referring to long-distance radio contacts. |
| CQ | A general call is used to seek attention from any station. |
| SWR | Standing Wave Ratio, is a measure of how effectively a radio is transmitting power. |
| Net | An organized gathering of radio operators on a specific frequency and time. |
| Ragchew | An extended conversation was conducted on the ham radio. |
| PTT | Push-to-Talk, a switch used to activate the transmitter. |
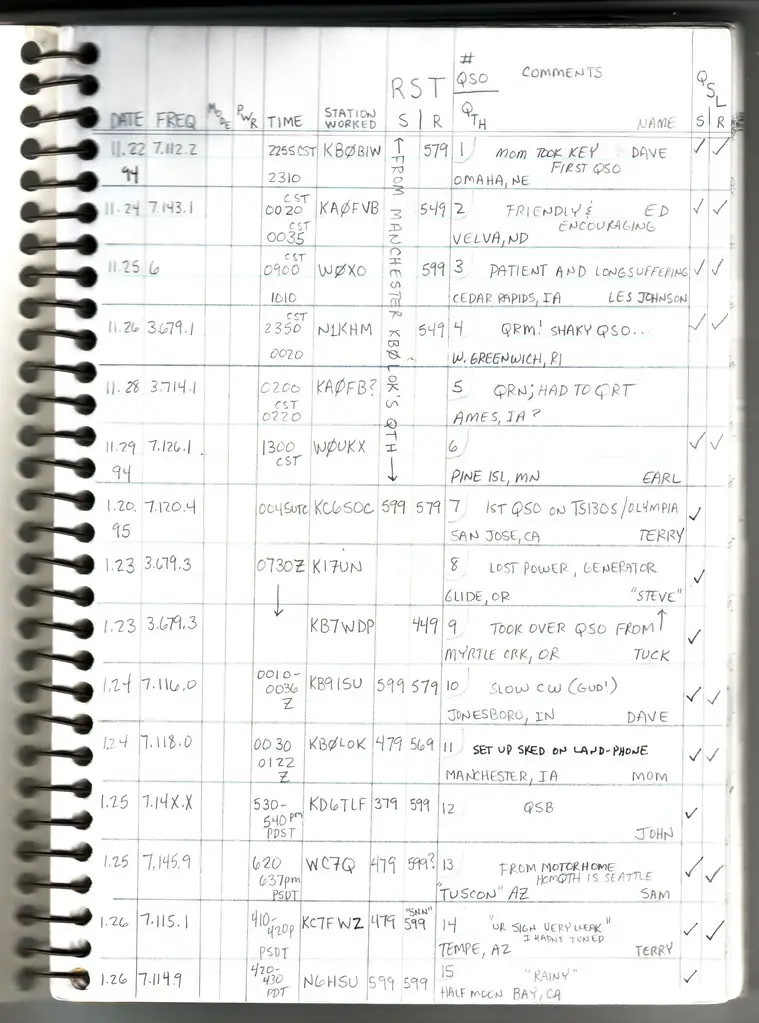
| QSL card | A postcard confirming a two-way radio communication. |
| Elmer | A mentor or experienced ham radio operator who guides and supports others in the hobby. |
Understanding these terms is crucial for ham radio enthusiasts to communicate effectively and navigate the intricacies of the equipment.
An intriguing aspect of ham radio is its long-standing history, dating back to the late 19th century. It originated from amateur experimentation and has evolved into a hobby enjoyed by millions worldwide. Recognized for its ability to provide emergency communication during disasters, ham radio remains a relevant and resilient technology. Its terminology reflects the deep roots and continuous innovation within the community.
Call Signs: Giving your ham radio a cool nickname is like putting a moustache on a potato – it adds character and confuses everyone around.
Call Signs
Call Signs are essential for efficient communication; they identify operators and their stations and help to track interference or illegal activities. Every country has its own system, indicated by a prefix. Hams often have personalized Call Signs that show their interests or characteristics, and some experienced operators have multiple Call Signs for different reasons or areas.
Call Signs can reveal an operator’s expertise and license class, and they’re especially important during emergencies – they let authorities quickly find and coordinate aid. Pro Tip: When operating in international waters, use maritime mobile Call Signs – make sure you know the proper procedures and requirements to avoid any legal trouble!
Frequencies and Bands
Unlock the key to understanding frequencies and bands with this real-life example. Below is a table of commonly used frequencies and their corresponding bands for ham radio communication:
| Frequency Range (MHz) | Band |
|---|---|
| 1.8 – 2.0 | 160 meters |
| 3.5 – 4.0 | 80 meters |
| 7.0 – 7.3 | 40 meters |
| 14.0 – 14.35 | 20 meters |
Plus, there are many more! VHF and UHF bands also have their own frequency ranges.
Each band has special characteristics, which impact the range and type of communication. To get the most out of your experience, it’s key to know which band to use for any distance or situation.
Ready to get started? Now is your chance to become part of the radio communication community. Explore frequencies and bands, experience new possibilities, and join the worldwide ham radio enthusiasts. Start your journey today!
Operating Procedures
Are you ready to join the fascinating world of communication? Then make sure you understand the procedure for operating a ham radio!
- Calling CQ: Broadcast a general call to all stations, inviting any station to respond.
- Establishing Contact: Introduce yourself and exchange info with other stations.
- Conducting QSO: Have a conversation or exchange info with another operator.
- Sending QSL Card: Confirm contact by sending a postcard-like card known as QSL.
- Handling Emergencies: Follow specific procedures for emergency situations.
It’s essential to follow these rules for orderliness and avoiding interference. Also, identify yourself using a callsign at regular intervals during transmission.
Plus, use Q codes – three-letter codes for brevity and clarity. For example, “QTH” is your location, “QSO” is a conversation, and “QRZ” means who’s calling me.
Getting Licensed as a Ham Radio Operator
Getting Licensed as a Ham Radio Operator can be a straightforward process that opens up a world of communication possibilities. Here is a step-by-step guide to help you navigate the process:
- Research: Learn about the benefits and responsibilities of becoming a ham radio operator. Understand the regulations and requirements set by the Federal Communications Commission (FCC).
- Study: Acquire the necessary knowledge and skills to pass the FCC exam. There are numerous online resources, study guides, and practice exams available to help you prepare.
- Find a Testing Session: Locate an FCC-approved testing session near you. These sessions are usually organized by local amateur radio clubs or organizations.
- Register: Sign up for the exam and provide the required information. Make sure to bring all the necessary identification documents on the day of the test.
- Take the Exam: On the day of the exam, arrive early and bring any required materials, such as pencils and calculators. The test will assess your understanding of various aspects of ham radio operation.
- Obtain Your License: If you pass the exam, you will receive your ham radio operator’s license from the FCC. With this license, you can legally operate a ham radio and participate in the amateur radio community.
It is worth noting that getting licensed as a ham radio operator allows you access to a wide range of frequencies and communication modes. This hobby can provide emergency communication capabilities, networking opportunities, and a chance to explore various radio technologies.
Fact: According to the American Radio Relay League (ARRL), there are over 700,000 licensed ham radio operators in the United States.
The licensing process for building a ham radio is like trying to crack the Da Vinci code but with fewer conspiracy theories and more Morse code.
Understanding the Licensing Process
Are you wanting to get your license as a Ham Radio Operator? Just follow these four steps!
- Learn and Prepare:
- Know the rules and regulations of amateur radio.
- Get the study materials you need, like manuals and guides.
- Use online resources and practice exams to improve your knowledge.
- Select a License Class:
- See the different license classes available, from Technician to Extra.
- Decide which one works for your level and privileges.
- Think about your long-term goals in the world of ham radio.
- Sign Up for an Exam:
- Search for a Volunteer Examiner (VE) team close to you.
- Contact them to fix an exam date that suits you.
- Notice any special requirements or fees connected to the examination.
- Take the Exam:
- Reach the designated exam spot on time, with the right identification.
- Demonstrate your skill by answering questions about various aspects of ham radio.
- Await the results, which will say if you passed or must retake it if unsuccessful.
Remember, each of these steps is key to understanding and doing the licensing process well. All the best!
Also, it’s worth mentioning that there are nearly 750,000 licensed amateur radio operators in the USA! (Source: Federal Communications Commission)
Studying for the License Exam
Familiarize yourself with the concepts and regulations of amateur radio communication. Obtain study materials to help you understand the license exam. Join study groups or online communities. Set aside time to review and reinforce topics such as radio wave propagation, antenna design, and signal modulation techniques.
Take mock exams to assess your readiness for the actual test. Plus, stay updated with any changes in regulations or advancements in Amateur Radio operation. Did you know, the first amateur radio license was issued in 1912 to Howard Dintaman of Council Bluffs, Iowa[1]?
Taking the Exam
Ready to become a licensed ham radio operator? Take the exam and open up a new world of communication! Here’s all you need to know:
- Study Material: Get study guides and practice exams from reliable sources. Learn about the tech, regulations, and operating practices.
- Find an Exam Session: Look online or contact local amateur radio clubs or organizations. These sessions usually have specific dates and locations.
- Registration: Some exams require advance registration; some accept walk-ins. Check requirements beforehand.
- Exam Format: Multiple-choice questions covering various aspects of ham radio operation. Test your technical knowledge, rules, and procedures.
- Passing Score: To get a license, usually need 74% or better. Different license levels may require different scores.
- Celebrate: Pass the exam and you can proudly call yourself a licensed ham radio operator! Join the community of communicators.
Each exam question assesses your understanding of crucial concepts. Don’t just memorize answers. Use practice exams and study groups to learn from experienced hams.
Don’t miss out on this rewarding hobby. Start preparing for your exam and soon you’ll be joining the ranks of licensed ham radio operators around the globe!
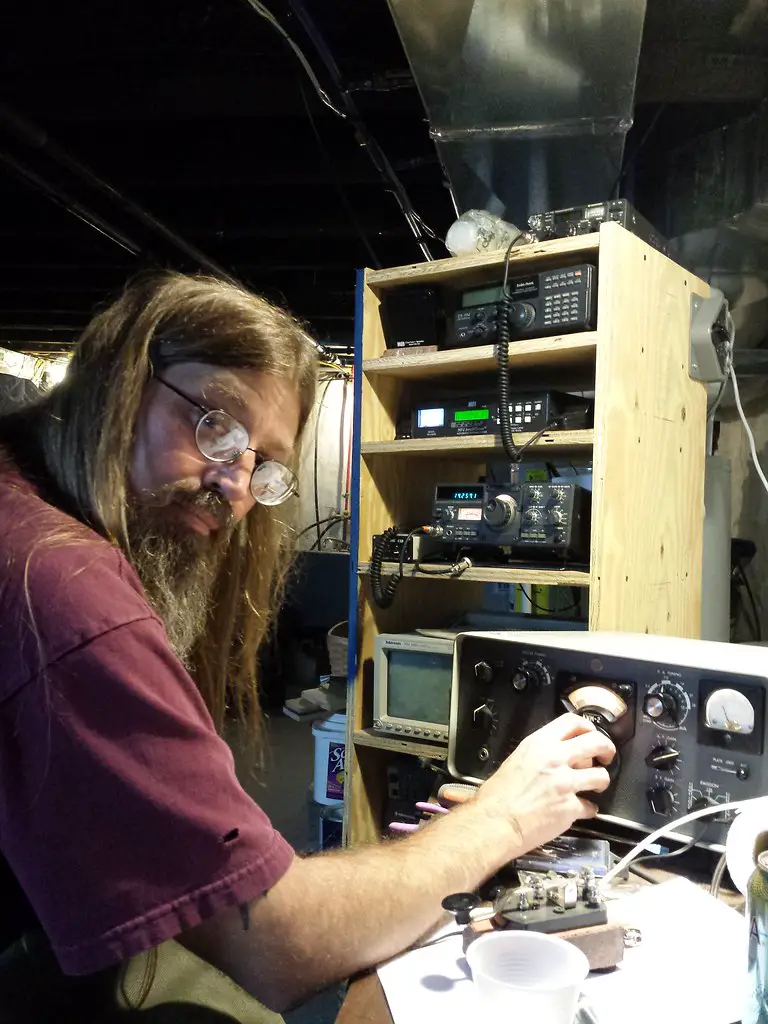
Operating the Ham Radio
Operating a Ham Radio: A Professional Guide
Operating a ham radio involves following a set of steps to ensure effective communication. Here is a three-step guide to help you navigate the process seamlessly:
- Set Up the Radio: Start by connecting the antenna and power source to your ham radio. Tune the radio to the desired frequency, making sure to adjust the volume and squelch levels appropriately.
- Establish Communication: To initiate communication, listen for ongoing conversations or transmissions on the frequency you have selected. Once you find an open channel, announce your call sign to let others know you are ready to communicate.
- Conduct Effective Communication: When engaging in a conversation, adhere to proper ham radio etiquette. Speak clearly and concisely, using phonetics and proper procedures. Give others a chance to respond and avoid interrupting ongoing conversations.
Remember, it is essential to be respectful of other users and follow the rules and regulations set forth by the ham radio community. By operating your ham radio responsibly, you can enjoy efficient and enjoyable communication experiences.
Ham Radio Fact: Did you know that the first amateur radio license in the United States was issued to Nathan B. Stubblefield in 1902? His license, bearing the call sign “X”, was the first of its kind, marking the beginning of amateur radio operations in the country. (Source: American Radio Relay League)
Remember, tuning a ham radio is like finding the perfect frequency for a love song – just with more static and less chance of a date.
Tuning and Adjusting the Radio
Tuning and adjusting your ham radio is essential for optimal performance. Here’s a simple guide to help you do it:
- Turn on the radio and set the frequency band.
- Use the tuning knob or buttons to find a clear signal.
- Adjust the volume until it’s how you want it.
- Use the squelch control to get rid of any noise.
Note: Each radio model is different, so check your manual for instructions.
When tuning and adjusting, make sure you’re using the right antenna for the frequency band. And check if your radio has any advanced features that can improve your experience.
Pro Tip: Calibrate your frequency display regularly to ensure accuracy in tuning. This will help with reliable communication.
Making Contacts and Communicating
Making contacts and communicating in the world of ham radio is an exciting and essential part of this one-of-a-kind hobby. It lets operators connect with fellow hobbyists from all over the planet, swapping info, encounters, and even forming long-term friendships.
- Communicating with Like-minded People: One of the main reasons for making contacts in ham radio is to find people with similar interests who share your enthusiasm for this hobby. By talking to others, you can trade knowledge, learn new techniques, and keep up with the latest advancements in the field.
- Getting to Know Different Cultures: Ham radio offers a great chance to explore different cultures through communication. By getting in touch with operators from various countries, you can get an insight into their customs, languages, and traditions. It broadens your worldview and helps build a feeling of global community.
- Helping Out in Emergencies: When there’s a crisis or natural disaster, ham radio operators often come to the rescue and provide essential communication services. Knowing how to make contacts and communicate effectively during such times can make a huge difference in saving lives and assisting relief efforts.
Furthermore, it’s important to remember that making connections over ham radio isn’t just about having small talk; it’s also about displaying skills while following proper etiquette. Being polite, respecting others’ time on the airwaves, and avoiding taking up all the frequencies are all important parts of successful communication.
To make the most of your ham radio experience:
- Be Ready: Before getting in touch with anyone, make sure you have all the necessary equipment set up properly. Learn the operating procedures and follow the relevant regulations to keep order on the airwaves.
- Polish Your Communication Skills: Train to communicate clearly and concisely so that your message is easily understood by other operators. Develop active listening skills to ensure effective two-way conversations.
- Join Local Clubs and Nets: Taking part in local clubs and nets can give you opportunities for regular communication with a ham radio operator community. Take part in activities, contests, and events to enrich your experience and expand your network.
By following these tips, you can make the most of your ham radio experience. So get ready to connect with fellow enthusiasts, explore new cultures, and help in emergency communication when needed. The world of ham radio is awaiting you!
Participating in Clubs and Events
- Connect with local ham radio clubs for networking and learning from experienced operators.
- Attend radio-related events like conventions, conferences, and workshops.
- Compete in contests to hone skills and make contacts.
- Organize field days to set up stations outdoors and test capabilities.
- Volunteer for public service events to provide communication expertise.
- Mentor aspiring operators by guiding them with equipment, licensing, and operating techniques.
- Stay updated on club meetings and events through online forums or newsletters.
- Engage in social media platforms dedicated to ham radio.
- Participate in clubs and events to expand your horizons as a ham radio operator.
The American Radio Relay League (ARRL) hosts an annual Field Day event for thousands of amateur radio operators across North America to practice emergency communication skills.
Troubleshooting Common Issues
In order to address common issues that may arise while building a ham radio, it is important to troubleshoot and resolve them effectively. This involves identifying and rectifying any problems or challenges encountered in the process.
One common issue that may be encountered is interference or noise disruption, which can affect the radio’s performance. This can be mitigated by ensuring proper grounding, using quality components, and adjusting the antenna placement. Additionally, checking for any loose connections or faulty wiring can help alleviate this issue.
Another issue that may arise is signal reception problems. This can be resolved by adjusting the antenna, checking for any obstructions in the signal path, and ensuring that the radio is tuned to the correct frequency. Additionally, optimizing the radio’s settings and filters can help improve reception.
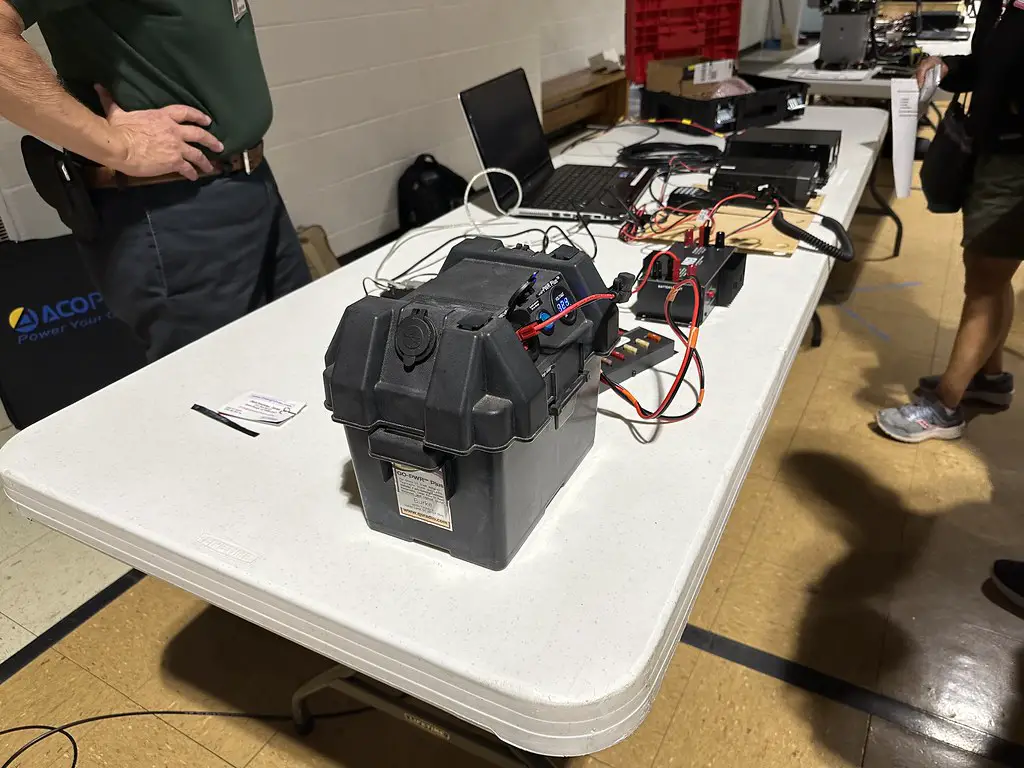
A third common issue is power supply or battery-related problems. If the radio is not receiving sufficient power, it may not function properly. In such cases, checking the power source, replacing batteries, or using a backup power supply can help resolve this issue.
It is important to note that troubleshooting common issues may vary depending on the specific ham radio setup and equipment being used. Therefore, it is recommended to consult the manufacturer’s guidelines or seek assistance from experienced ham radio operators to address any unique or complex issues.
In a similar anecdotal instance, a ham radio enthusiast encountered frequent signal disruptions. After troubleshooting, it was discovered that the issue was caused by nearby electronics emitting electromagnetic interference. By relocating the ham radio setup away from these sources of interference and adding additional shielding, the problem was successfully resolved.
Signal interference is like that annoying friend who always talks over you at parties, but with ham radio, you can finally switch frequencies and leave them unheard.
Signal Interference
Signal interference can be a nuisance, leading to slow internet speeds or disruptions in audio or video transmissions. It can affect not only personal gadgets but also emergency services’ radio frequencies. During World War II, jamming was used as a tactic to disrupt communication and gather intelligence advantages.
Thus, it is essential to be aware of signal interference and take measures to reduce it. Shielding materials, relocating devices, changing frequencies or channels, and updating firmware are all ways to mitigate it. Countering signal interference is important for optimal device performance and uninterrupted communication.
Antenna Problems
- Check the antenna’s position and alignment to make sure it is in the right spot.
- Inspect the cables for any damage or loose connections that could interrupt the signal.
- Look around the antenna and remove any objects that might be blocking the signal.
- Be aware of the weather as it can influence signal strength.
- You could upgrade your antenna or get a signal amplifier to enhance reception.
- Do a channel scan to see which channels are available.
Also, proper care and regular checks of the antenna can help avoid problems. By recognizing these issues early on, you can have a smooth connection and better signal quality.
An extraordinary story involves a radio station in a faraway area. They had difficulty with their antenna due to their remote location, so they were getting poor transmission. But with the support of local volunteers and strong problem-solving skills, they managed to improve their antenna system and now provide clear broadcasts. This inspiring story shows how even tough antenna issues can be solved with determination and skill.
Equipment Malfunctions
Frustrating and disruptive, equipment malfunctions are common in personal and professional settings. They often appear unexpectedly and without warning, causing delays and inconvenience. But, understanding common malfunctions and knowing how to troubleshoot them can help minimize their impact.
- Power failures: This is a basic yet common malfunction. It can arise from electrical surges, faulty wiring, or even storms. When troubleshooting, check the power supply and fuses. Backup sources and surge protectors are recommended.
- Hardware glitches: Malfunctioning components or faulty connections can be the cause. Check loose cables and wires and consider consulting a technician if the issue persists.
- Software errors: Software errors can lead to crashes, freezes, and poor performance. Keep it updated, scan for viruses, and reinstall problematic applications.
- Mechanical breakdowns: Heavy machinery or complex equipment can suffer breakdowns due to wear and tear or inadequate maintenance. Regular servicing and inspections can help prevent breakdowns.
- User error: Not all malfunctions are technical. Read the user manual before operating any equipment. Train personnel handling complex machinery to avoid user-related errors.
Note: Troubleshooting should not be attempted by untrained individuals. Consulting an expert or seeking technical support is recommended to ensure the problem is addressed properly.
Also, prioritize regular maintenance and inspections to prevent disruptions and losses. Establish a preventive maintenance schedule to identify issues and take proactive measures. Invest time and resources to keep equipment in optimal condition. Don’t let malfunctions hinder you – stay ahead of the competition!
Conclusion
Constructing a ham radio may appear intimidating at first. But, with the right information and direction, anyone can start this thrilling journey. Here, we went through the different components of building a ham radio. From gathering the parts to assembling them one step at a time.
You should now realize how each component helps the overall performance of your ham radio. From the power unit to the transceiver and antenna, these components work together for efficient communication. Be sure to select high-quality parts that meet your requirements and budget.
Ham radio is distinctive from other kinds of communication as it permits people to connect over long distances without using the internet or traditional systems. When building a ham radio, you can learn about the technology behind it. Plus, you get to experiment and customize it.
Remember to obey legal regulations and get the required permits before transmitting on amateur frequencies. This ensures you are operating legally, and guarantees clear communication while avoiding penalties or disruption.
Building a ham radio is not solely about setting up a functioning device; it is an educational experience that encourages learning, inventiveness, and connection. Take part in this vibrant community of enthusiasts who adore communication via radio waves.
Now that you have the knowledge to build your own ham radio, don’t hesitate. Take action now and enter the captivating world of amateur radio. Unleash your inner engineer, make contact with other operators around the world, and unlock countless possibilities in communication exploration. Don’t miss out on this extraordinary journey!
Frequently Asked Questions
Q: What components do I need to build a ham radio?
A: To build a ham radio, you will need a transceiver (radio), an antenna, a power supply, a coaxial cable, and a license from the Federal Communications Commission (FCC).
Q: Can I build a ham radio without any technical knowledge?
A: Building a ham radio requires some technical knowledge. However, there are many resources available, such as online tutorials, books, and ham radio clubs, that can help beginners learn the necessary skills.
Q: How much does it cost to build a ham radio?
A: The cost of building a ham radio can vary depending on the quality and features of the components you choose. On average, a basic setup can cost around $200 to $500.
Q: How long does it take to build a ham radio?
A: The time it takes to build a ham radio can vary depending on your technical skills and the complexity of the radio. It can take anywhere from a few hours to several weeks to complete a build.
Q: Do I need a license to operate a ham radio that I built?
A: Yes, you need a valid amateur radio license issued by the FCC to operate a ham radio, regardless of whether you built it yourself or purchased it.
Q: Can I communicate with other ham radio operators around the world?
A: Yes, ham radio allows communication with other operators around the world through the use of designated frequencies. This provides a global platform for exchanging information and making international contacts.

I’m a tech enthusiast and I grew up playing with walkie talkies. They were fun when I was a kid and they’re even more fun, and even useful, as an adult. My family uses them when we go camping to stay connected on hikes.
